Triggers can be useful when sending out yearly offers during Christmas, Valentine and other celebrated days throughout the year, but also when new registrations have been filled out.
Start off by creating the actual email you want to send out to your subscribers. We recommend you using one of the mobile-ready templates, as it is increasingly common to read e-mails on a mobile these days. But stay calm, the templates work equally well when opening it in a web browser on a computer. Now, create the trigger that makes sure the offer will be sent to the right person at the right time.

1. Click Create/Send
2. Click Triggers
3. Click Create Trigger
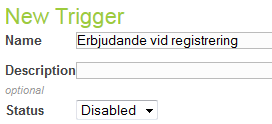
4. Enter a name that describes the function of the trigger and add a description if necessary.
5. Set the Status drop down to Disabled if you don’t want the trigger to begin working immediately. This status is easy to change.
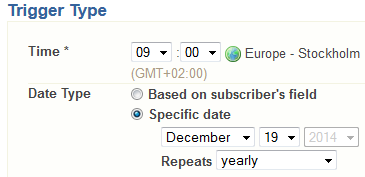
6. Now you will need to schedule the time the message will be sent. Time, days after registration or a specific date.
7. Select whether the message should be sent out more than once, for example monthly or yearly.
Note! Triggered blasts only go out at the time specified. The trigger will compensate for the correct last day of a month. If you set a trigger to send on the 31st of a month and have it repeat monthly, it will always send on the last day of the month.
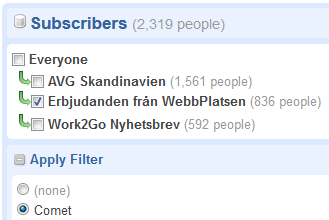
8. Specify the lists that you would like to send to. You can also apply a filter at this point. For example if you have a customer with a specific contract that does not suit the deal you would like to send to your other customers.
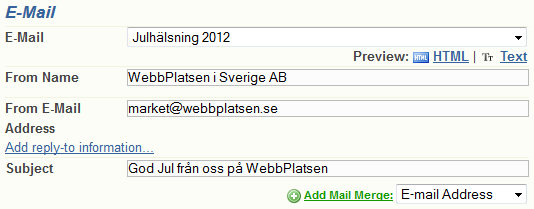
9. Select the e-mail message you created earlier.
10. Enter the name of the sender and the email address.
Consider adding another reply address by clicking on Add reply-to information.
11. Enter the subject and use Mail Merge if you want to personalize it with the recipient’s name eg.
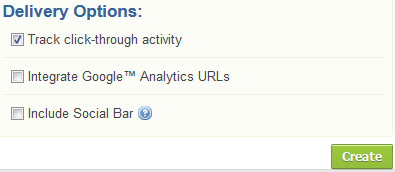
12. Keep the Track click-through activity selected. This will give you reports letting you know what succeeded and what failed in your message.
Select Integrate Google Analytics URLs if you are using Google Analytics.
Select Include Social Bar which makes it easier for your customers to share your offer with their friends.
13. Finnish of by clicking Create.